aeroTEST Guide: Outdoor CdA Testing Step by Step (2026)
One road, one afternoon, one number that tells you whether the new helmet was worth the money. That is an aeroTEST: you ride a kilometre out, turn, ride it back, and the platform combines your power and speed with the road and the conditions to estimate your drag area, CdA. Change one thing, ride again, compare. No wind tunnel, no velodrome booking, no waiting list. This is the complete walkthrough, from the kit you pack to the chart you read at the end, for both ways of running it: guided by the aeroAPP on your Garmin, or manually with any head unit that records a FIT file.
Already testing and wondering why your numbers wobble? The companion piece is What makes a good aeroTEST. This one is the how.
Three words you need
- aeroTEST is the whole session: everything you test on one day, on one road.
- Setup is one combination of equipment and position. Your normal race kit is a setup. The same kit with a different helmet is another setup.
- Run (the platform calls it a test) is one out-and-back within a setup. Each setup needs at least two runs that agree.
For planning, allow three runs per setup: a five-setup afternoon is then about fifteen runs, plus the calibration run at the start.
What you need
- A power meter. Non-negotiable: the method solves for CdA from power and speed, so without power there is no test. A true dual-sided meter, or a dual-sided crank or spider system, gives cleaner data than a single-sided one (why, in the quality article).
- A head unit. A Garmin Edge with the aeroAPP guides you through every run and sends the data as you ride. Any other head unit works for the manual route, as long as it records power, speed and GPS to a FIT file.
- A speed sensor. Optional. Correctly set up, with a measured circumference, it gives cleaner speed data than GPS alone and can lower the uncertainty of a run. Take it if you have one.
- A scale. You need the system weight: you, the bike and your standard setup, weighed together.
- The kit you want to test, plus the tools to swap it. A helmet swap is quick; changing extensions can take long enough for the conditions to drift. Group the slow changes, and repeat the baseline after them.
- A phone with mobile data if you test with the aeroAPP. It relays the data to the platform.
- Drinks and a jacket for the waiting between setups. You will stand around more than you ride.
Before you leave the house
- Create your account on afasteryou.com. Outdoor aeroTESTs are part of the free account.
- Install the aeroAPP and log in if you test with a Garmin. Do it at home, not at the roadside: the login runs through your phone and has three common ways of failing without any error message. aeroAPP setup and login walks through them.
- Pick your road. A straight kilometre, flat (less than 5 m of height difference end to end), smooth surface, little traffic, some shelter from wind. The road matters more than any piece of kit; we measured it across 977 roads. If you have two roads in different directions, check the forecast the evening before and pick the one that puts the wind on your side.
- Write your plan. Which setups, in which order, how many runs each. One change per setup. A note on paper beats memory when you are cold and on your fourth helmet.
- Charge everything. Head unit, power meter, speed sensor, phone. Change the sensor battery if in doubt.
- Choose your test power. Your race power for the event you are optimising for. Higher power gives a stronger aero signal, but only if you can hold it steady for fifteen runs.
On site
- Calibrate the power meter once, before the first run, and leave it alone for the rest of the session. A zero-offset in the middle of the day shifts every run after it.
- Enter the wheel circumference by hand on the head unit. Automatic circumference detection can change between runs; a measured value cannot.
- Weigh the system: you, the bike, the baseline kit, bottles as you will ride them. The platform stores a system weight per setup, so if a setup changes the mass (a wheel, a full bottle), enter the new weight for that setup.
- Same tyre pressure for every setup. Check it, do not assume it.
- No wind jacket during a run. Wear it between setups, take it off before every measured leg. A flapping jacket is drag that changes from second to second, and the method has no way to average it out.
The out-and-back, run by run
Safety comes before the measurement. You are riding on a public road. Follow the traffic rules, pick a road with enough visibility, look over your shoulder before every U-turn, and abort a run whenever traffic, pedestrians or the road surface make it unsafe. A run you break off costs you three minutes. Never trade observation or bike control for a number.
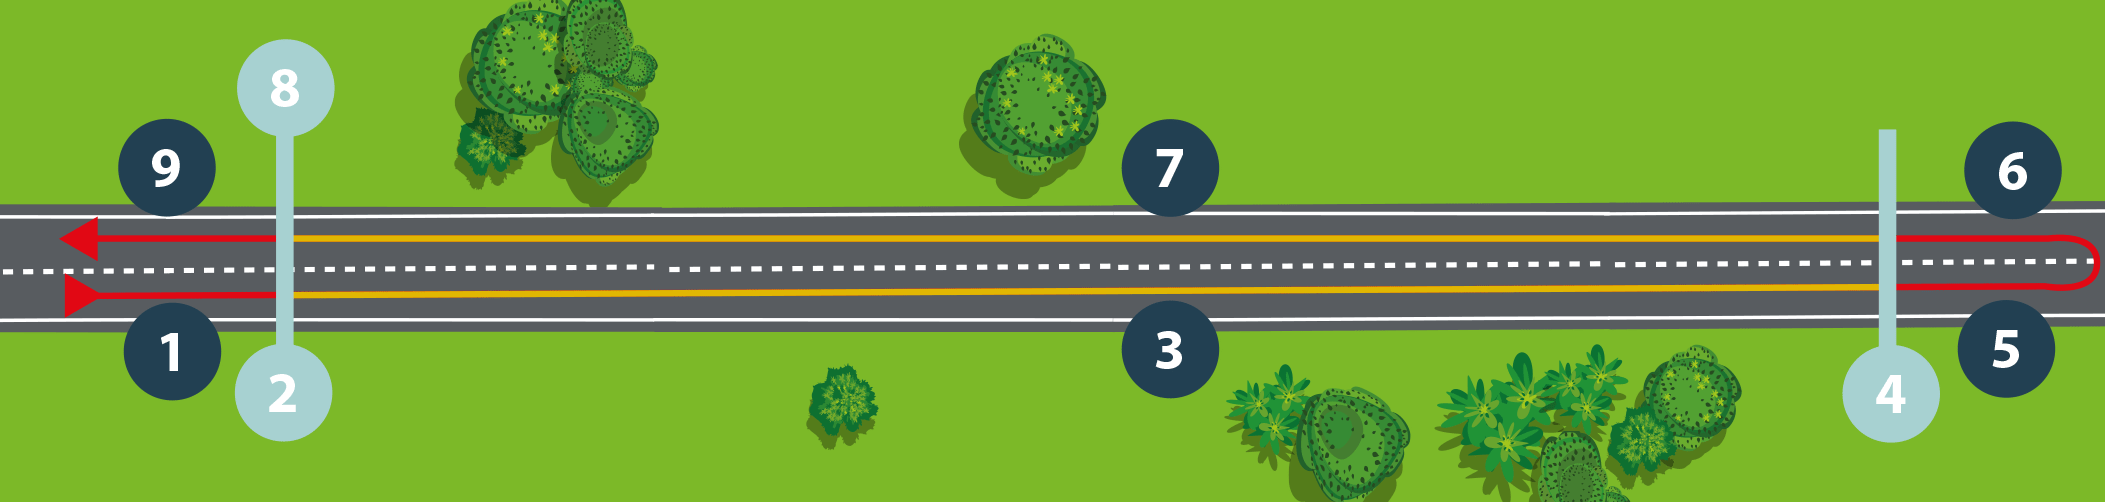
- Accelerate to your test power before you reach the start marker. Your speed at the marker should already be your test speed.
- Start. With the aeroAPP, the device counts the metres down to the marker and starts the run itself. Manually, you press Start (or Lap) as you pass it.
- Outbound. Hold power and position for the full kilometre. Not average power: the same power, second after second. On the measured stretch, keep your hands where they are and your head where it is; do not sit up.
- Turn marker. The aeroAPP tells you when you can turn. Manually, roll out past your turn marker.
- Turn. Roll out, shoulder check, turn around when the road is clear. No sprinting through the U-turn.
- Accelerate again to the same power as on the way out.
- Inbound. Same power, same position, all the way back.
- Finish at the start marker. The aeroAPP stops the run and sends the data. Manually, press Stop (or Lap).
- Roll out, read the result, and start the next run or the next setup.
The two directions are the trick, and it is worth knowing what they can and cannot do. Riding the same stretch both ways lets the model separate your drag from the road's gradient and from a reasonably steady wind along the road. What does not cancel: gusts, a wind that changes between the two legs, and a rider whose position changes between them. That is why the road still matters, and why the two legs must be ridden the same way. Sit up for the last hundred metres of the inbound leg and you have thrown away the run.
How a session is built
| Setup | Purpose | Runs |
|---|---|---|
| Setup 0 | Calibration run for the platform's algorithm. Its CdA is not used. | 1 |
| Setup 1 | Baseline: your normal kit and position | at least 2 |
| Setup 2 | Change 1, for example a different helmet | at least 2 |
| Setup 3 | Change 2 | at least 2 |
| … | one change per setup | … |
| last | Baseline again | at least 2 |
Two rules make the day worth something. One change per setup: swap the helmet and the skinsuit at once and you learn only their combined effect, not which of the two caused it. And come back to the baseline at the end. Conditions drift over an afternoon; a repeated baseline shows you how much of the drift is the day and how much is the kit.
Give the baseline four or five runs when the road or the bike is new to you. Once you know the road returns the same number, two runs that agree are enough.
With the aeroAPP
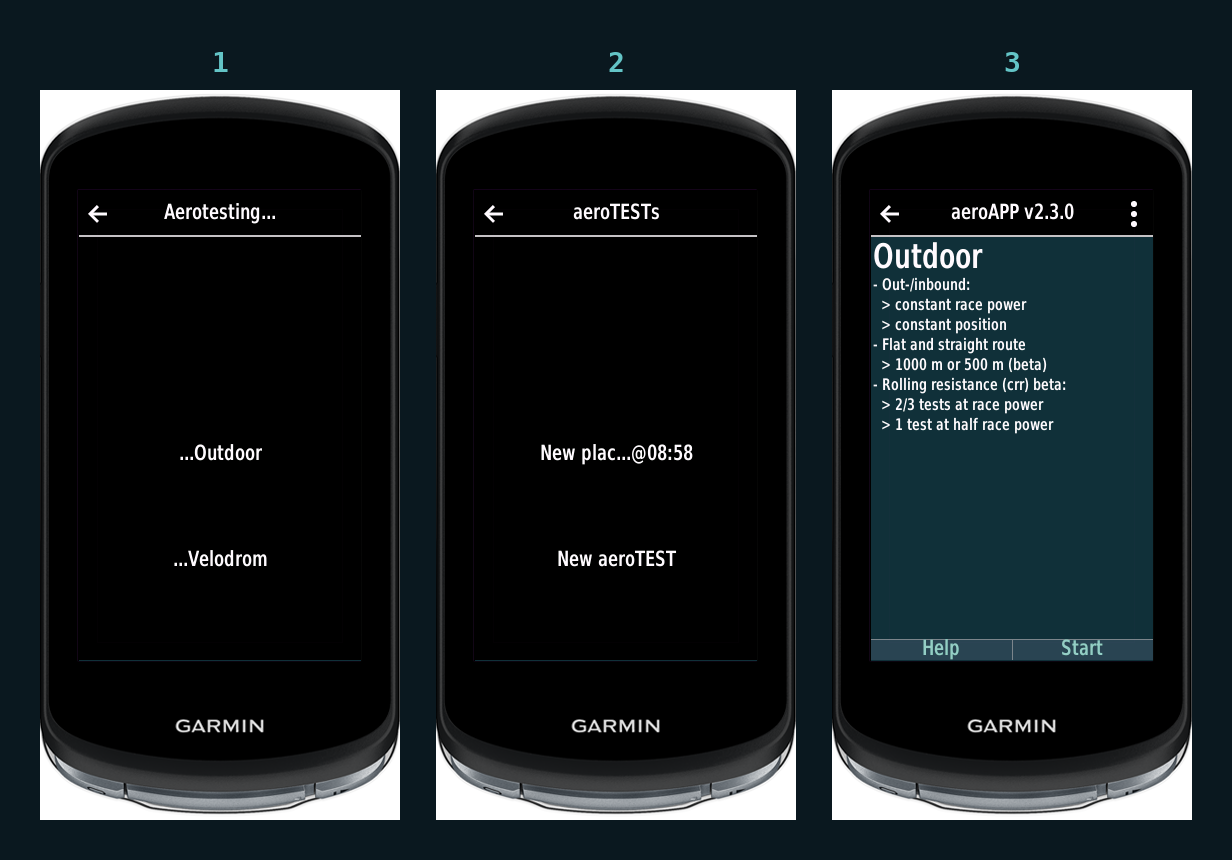
The app runs the protocol for you. On a road you have tested before, it offers the saved routes whose start point is less than three kilometres from your GPS position and counts you down to the start. On a new road, you press Start once at the point where the route should begin, and the app stores it for next time.
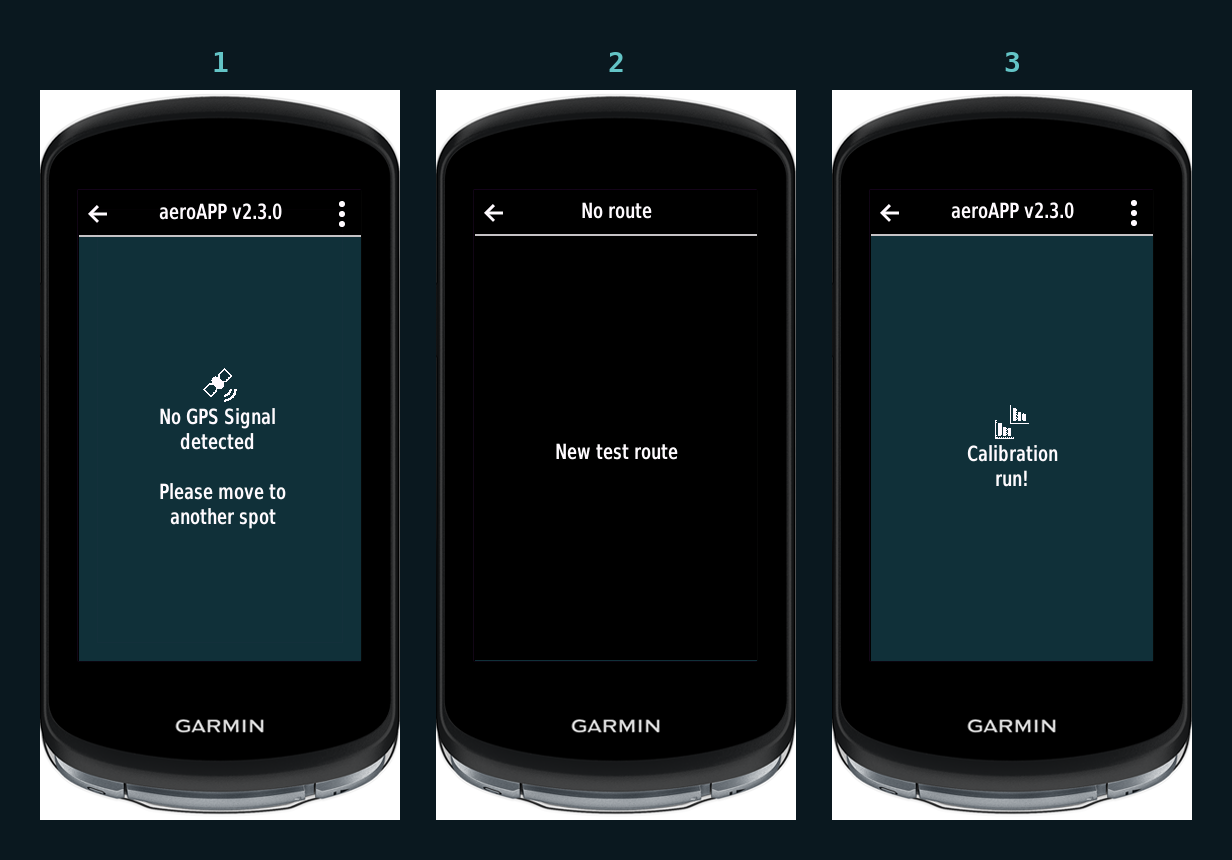
After each run it checks the result against the previous run of the same setup:
- "Success! The test is done. Validate with an extra test." Ride the second run.
- "Success! The position is stable. Do the next setup." The two runs agree. Change one thing and continue.
- "Position not stable. Please repeat the test." The two runs disagree by more than the app allows. Ride another one. Possible causes: a gust, a moment of sitting up, or a helmet or position that was not reproduced the same way twice.
- "Turn too early. Please repeat." You turned inside the route. Ride to the marker next time.
Every run is also saved as a FIT file on the device, so if the phone connection drops during a run, you can drag the file onto the platform later.
Without the aeroAPP
Ride the road once to place two markers in your head, or on the road: the start point and the turn point, about a kilometre apart. Then ride the nine steps above, pressing Start at the start marker and Stop at the same marker on the way back.
One file per run is the safest way. You can also ride all runs of a setup back to back without pressing Stop between them and save one file per setup; the platform's out-and-back detection then separates the runs in the file. Either way, name or note which file belongs to which setup.
Back home, on afasteryou.com under Aerotest:
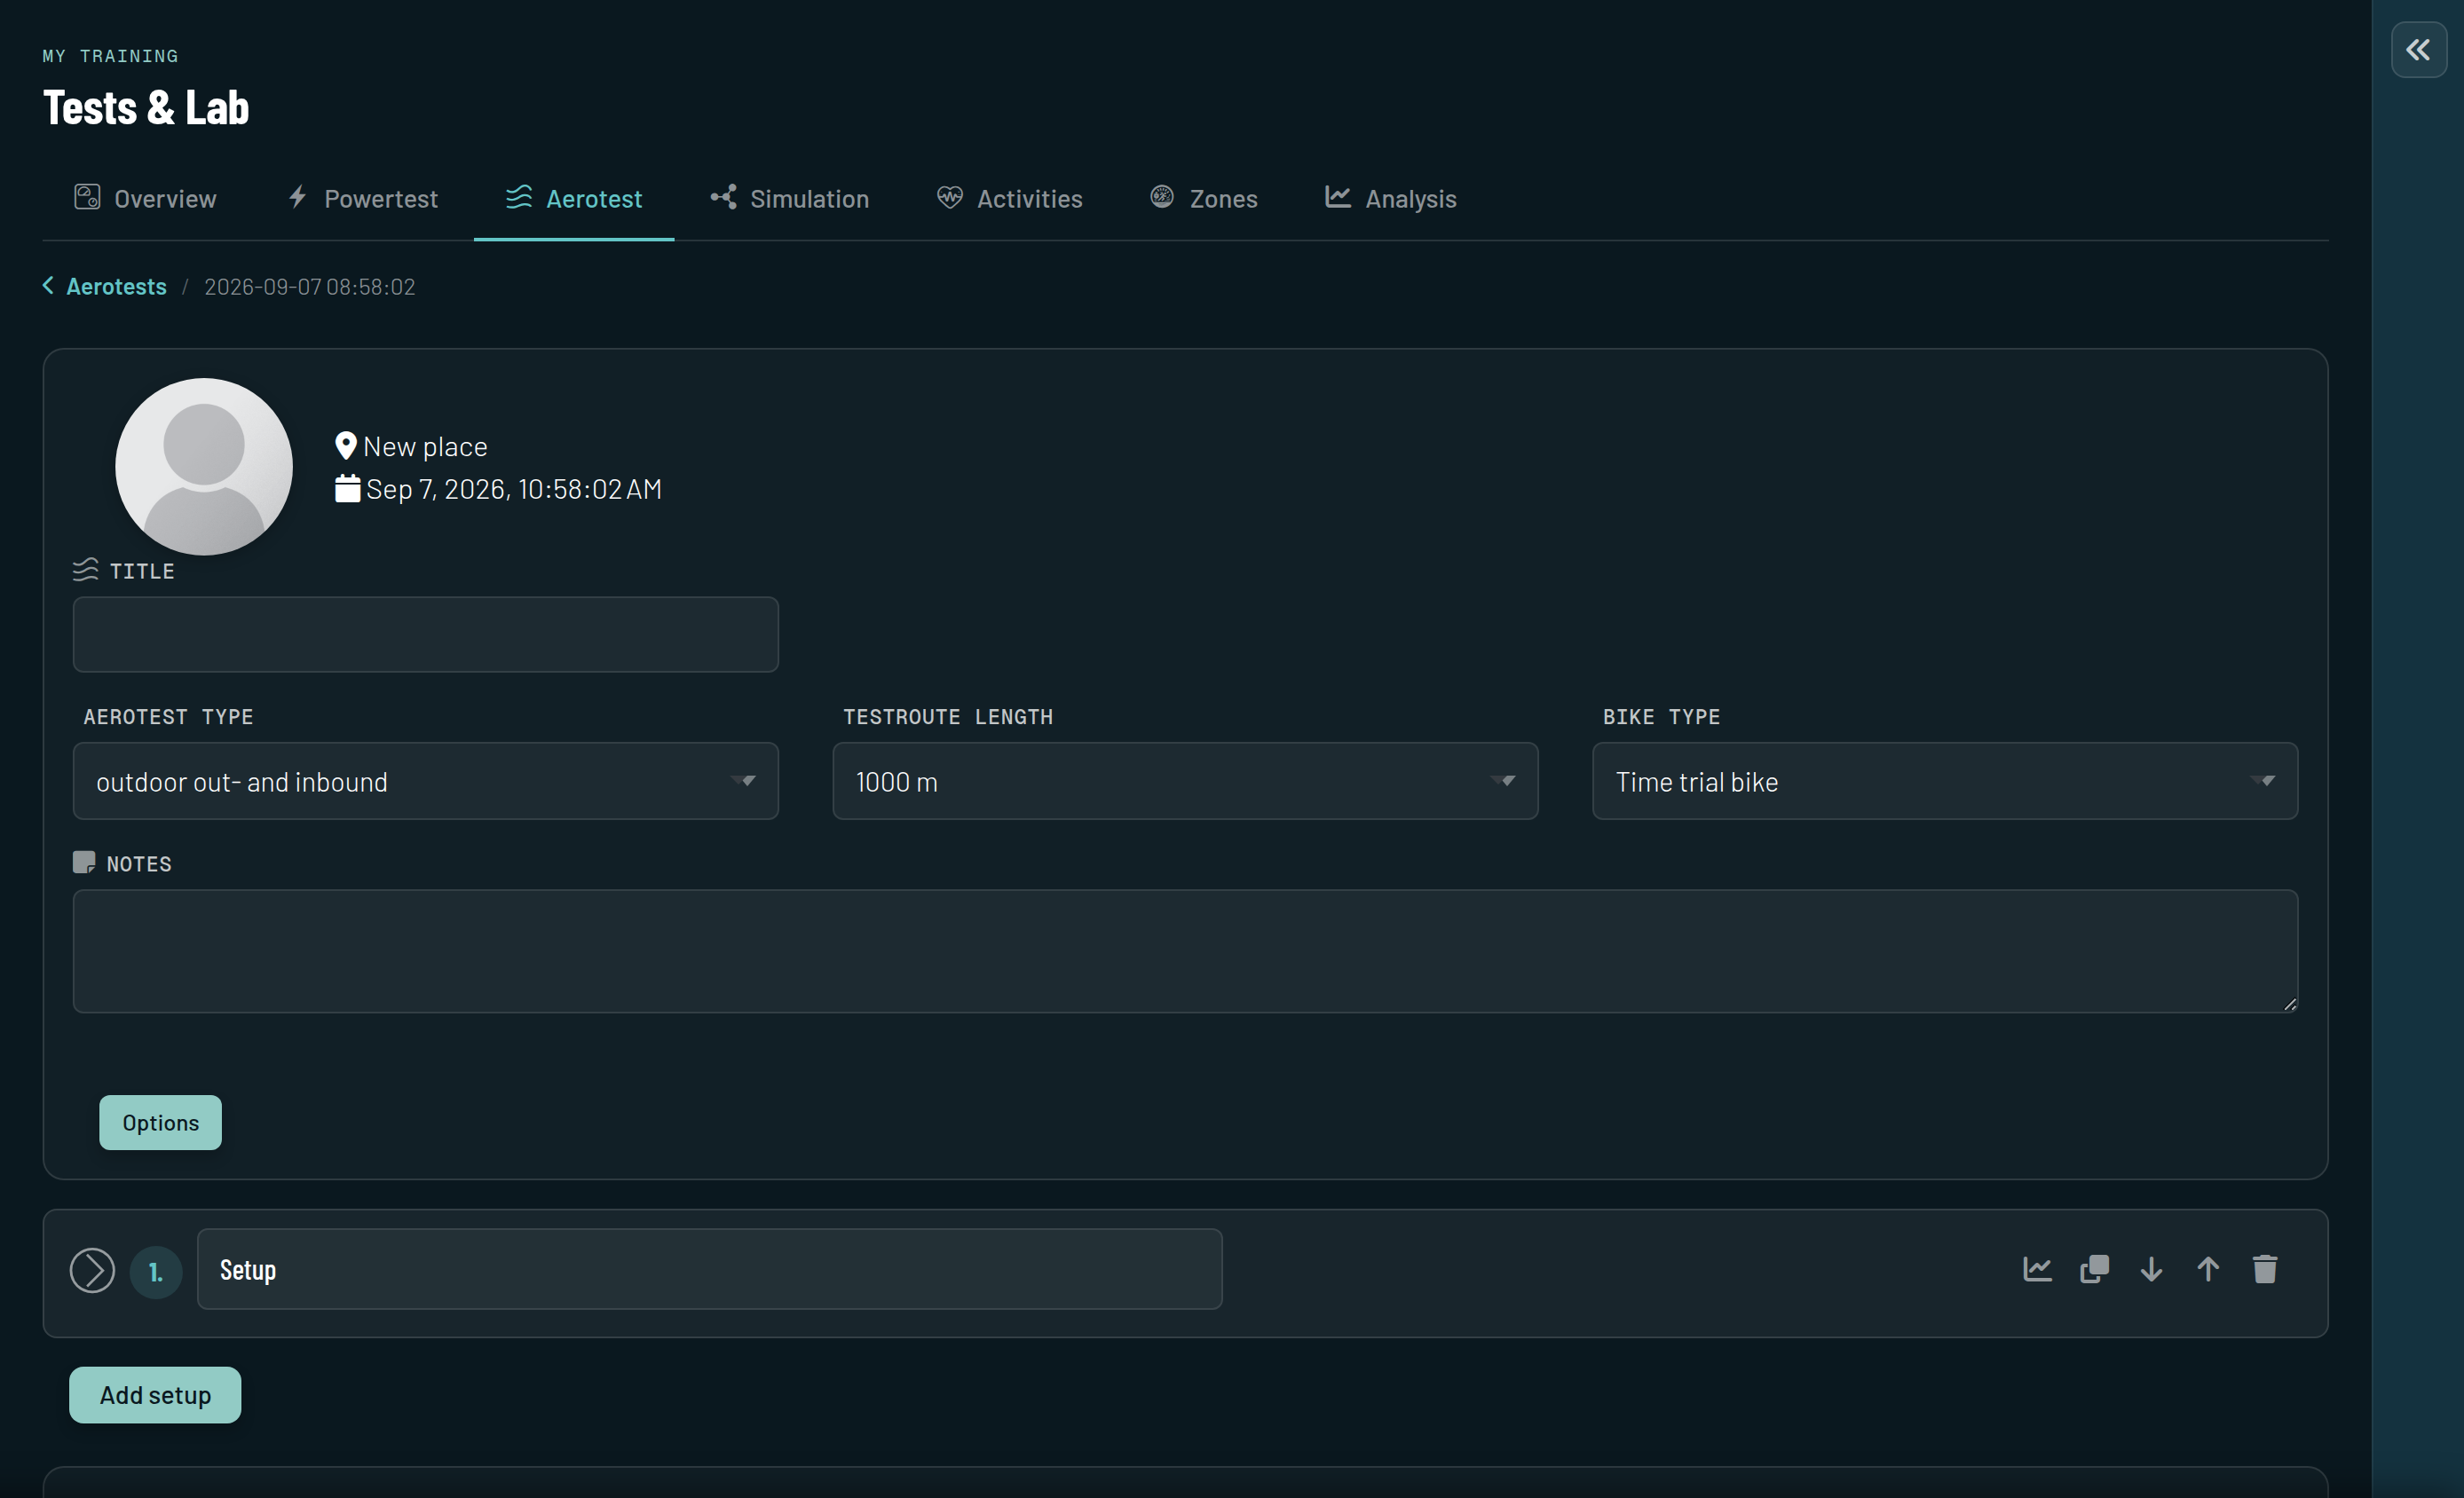
- Create aeroTEST and enter the session: your weight, the bike, the road, the conditions.
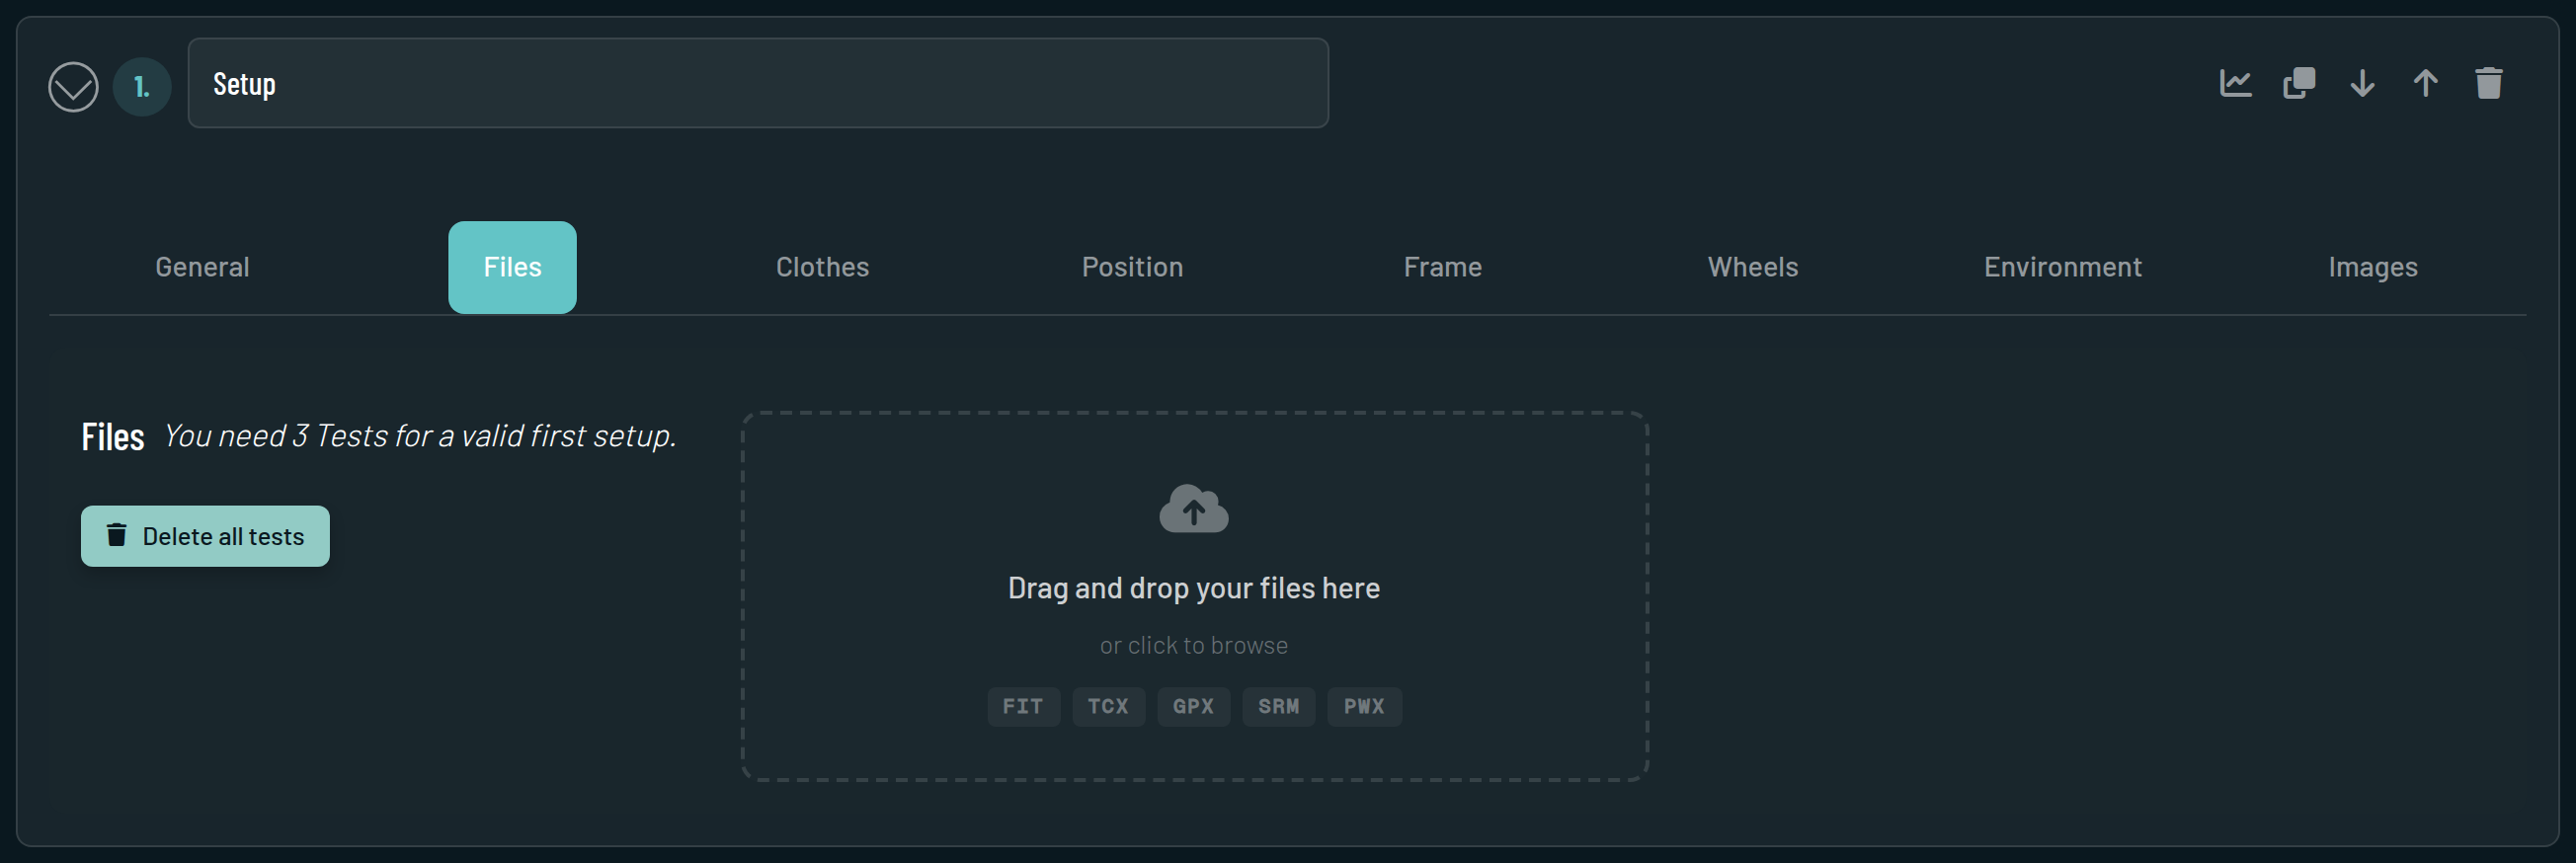
- Add a setup for the calibration run and drop its file onto it.
- Add the baseline setup, describe the kit, drop the file (or files) onto it. The copy tool carries the entries of one setup into the next, so you only change what you changed.
- Add one setup per change, in the order you rode them.
- Calculate. The platform fits every run and shows the result.
Reading the result
The platform reports CdA in aero points (aP): 1 aP is 0.01 m². Road bikes ridden in the drops typically sit around 30 to 35 aP, time-trial positions between 20 and 26 aP (background in Cycling aerodynamics and CdA). Three charts tell you whether the day was good:
- CdA per run, each with an error bar. The bar is the platform's uncertainty estimate for that run: it fits the run, compares it with the other runs of the setup, and reports the larger of the fit error and the run-to-run disagreement, as a share of CdA. It is an uncertainty indicator, not a formal confidence interval. Runs of the same setup that sit close together support a stable setup. A wide spread tells you to look at wind, position and power smoothness before you trust the average.
- CdA per setup, combining the accepted runs, again with its error bar. A difference between two setups that is smaller than their error bars is not a result yet: treat it as inconclusive and ride another clean run of each instead of declaring a winner. What a given uncertainty means in watts, and why faster runs resolve finer, is in velodrome resolution by speed.
- Effective wind per run. The wind the platform reconstructed from the two legs. Low, consistent values are what you want to see. A run that spikes while its neighbours sit flat points to a gust or another disturbance; look at that run and its flags before you use it.
The three charts below are from a real session on the platform: six setups, fourteen runs, one afternoon in 2018.
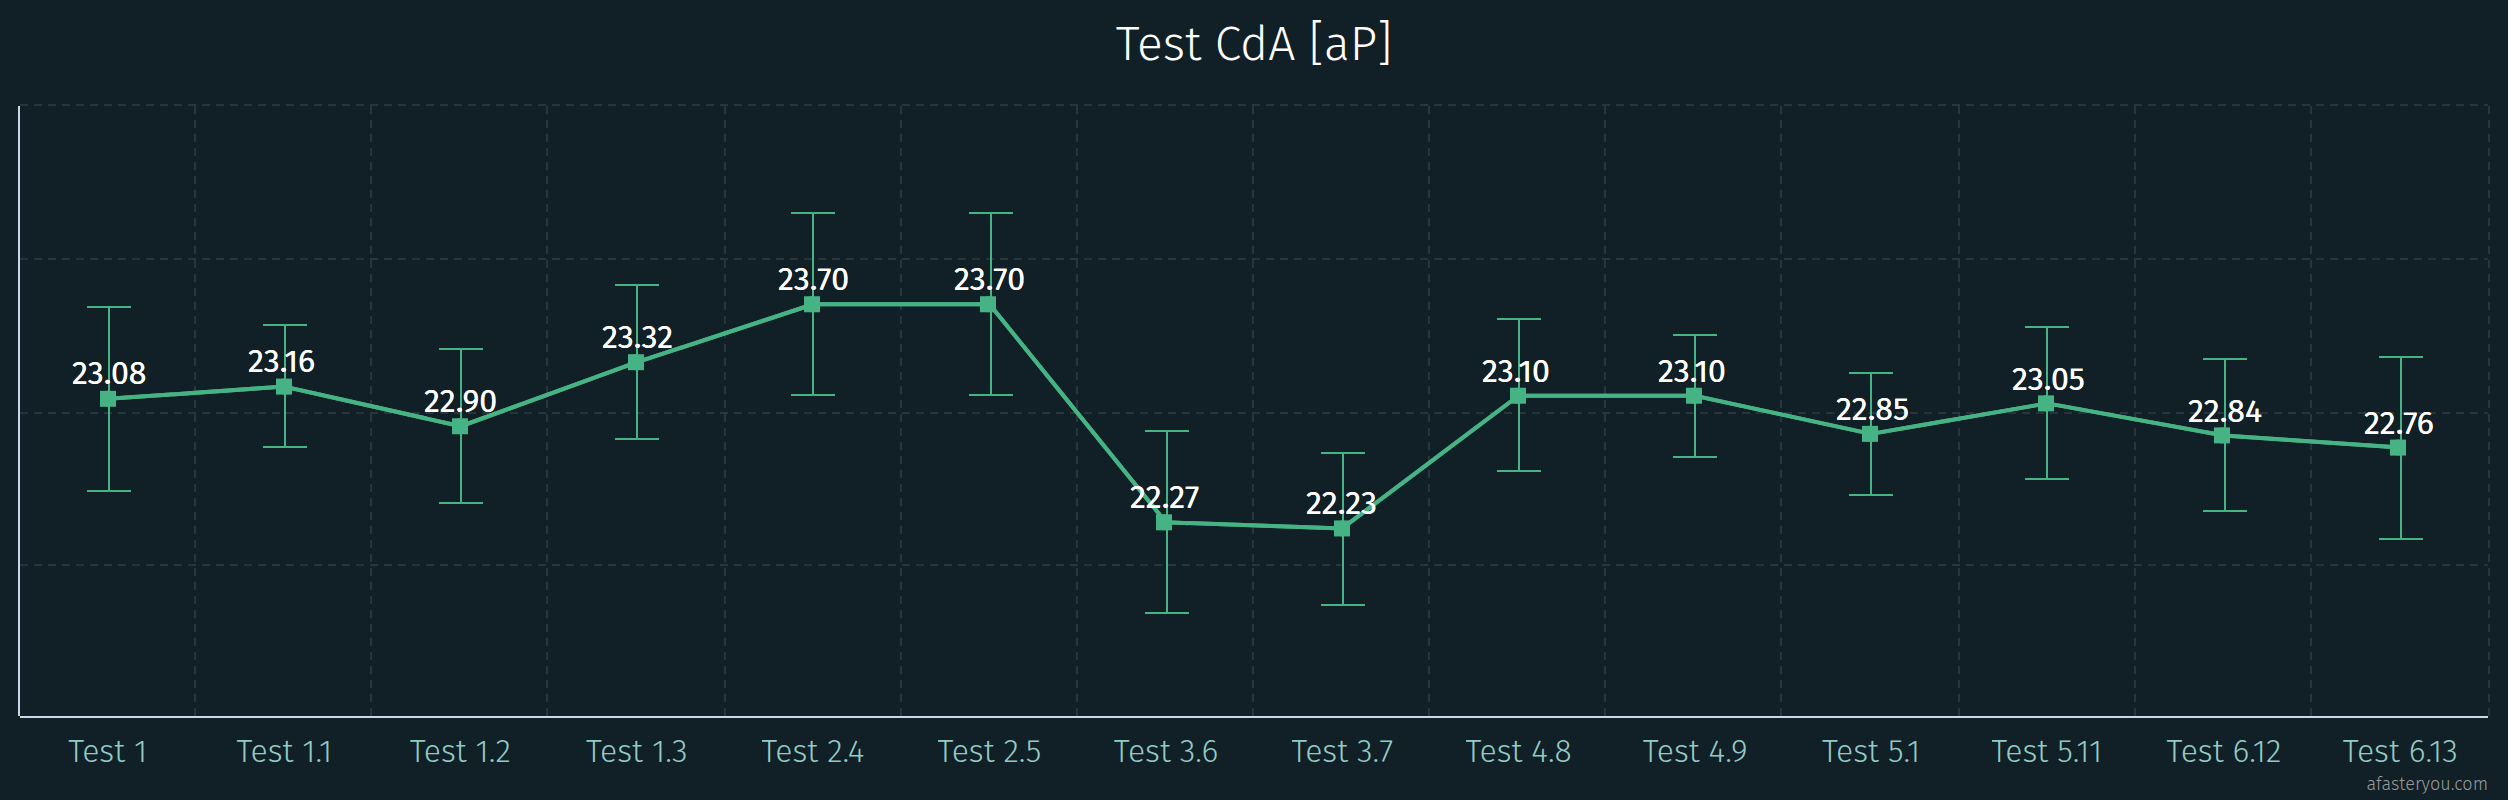


Next to the charts, the ride-quality panel shows how smoothly you held power in each run. It is the quickest explanation for a wide error bar: an unsteady ride limits CdA precision, and no amount of processing brings it back.
FAQ
Do I need a power meter? Yes. The aeroTEST solves for drag from power and speed. Without power there is nothing to solve.
Is the outdoor aeroTEST free? Yes. Outdoor aeroTESTs are included in the free account. The aeroAPP's Professional mode needs a Powermonth; it allows unlimited runs per setup and adds a rolling-resistance test (beta), which estimates the coefficient of rolling resistance (Crr) from two or three runs at race power and one at half power. Velodrome testing runs on the Coach account.
Can I turn a normal training ride into an aeroTEST afterwards? Usually not. The platform needs a deliberately ridden, clean out-and-back on the same road, roughly a kilometre each way, at steady power and position. A loop, a criss-cross ride or a long tour has no such segment, and the evaluation stops with the message that no out-and-inbound route was found.
How many runs per setup? At least two that agree; budget three. For a picture of what riders actually do: from 13,000+ outdoor sessions on our platform since 2018, we deliberately selected the valid out-and-back tests and, after the calibration run, the setups with at least two runs carrying neither an error nor an outlier flag. That strict selection gives 7,190 setups (as of September 2026). Of those, 55 % contained exactly two clean runs, 34 % three, 11 % four or more. The figures describe this clean subset, not why each run was ridden.
I tested the same setup on two days and got two numbers. Which is right? Possibly both, within their uncertainty. The platform corrects for air density, but a different wind angle, a suit that sits differently, a position you did not quite reproduce and plain measurement uncertainty all move the number. Temperature matters where it changes something the model does not fully capture, such as the rolling resistance of your tyres. Compare setups within a session, and compare days through the baseline you repeated in each.
What is the calibration run? The first run of the session, Setup 0. It calibrates the platform's algorithm to the road and the day. Its CdA is not a result and is not used in the comparison.
500 m or 1,000 m? 1,000 m. The 500 m route exists in the app as a beta for roads where a kilometre is not available, and it costs you precision. If you have the kilometre, ride the kilometre.
Sources: aeroTEST method and aeroAPP as implemented on afasteryou.com, September 2026. Runs-per-setup figures: outdoor out-and-back aeroTESTs on the platform, 2018 to September 2026, valid sessions with at least two clean runs per setup after the calibration run, 7,190 setups. Physics: Martin, J.C. et al. (1998), Validation of a mathematical model for road cycling power, J Appl Biomech 14(3):276–291. Out-and-back principle after Chung, R. (2012), Estimating CdA with a power meter, anonymous.coward.free.fr/wattage/cda/indirect-cda.pdf; the platform's own fit adds wind reconstruction, outlier detection and a per-run error estimate. Companion data pieces: Outdoor aero testing: why your road matters, Velodrome aero testing: resolution by speed.